Design Project: Planet Exploration Vehicle
I asked my esteemed colleague Kevin (who is currently kicking my ass with his output, so I gotta catch up) to throw me out an assignment off the top of his head, and he IMed back "Planet Exploration Vehicle." So here is one of those:
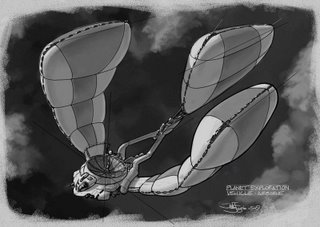
I saved out many progress images in case anyone wants to see the process. I'm trying to work in something similar to the Doug Chiang way, so...
1. I started with a really rough page of thought-scribblings, going with the first shape that popped into my head, which you'll see in the middle of the page.
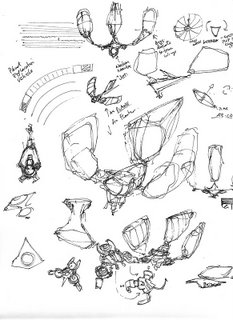
The first thing that came to me was "aerial automated probe for dense-atmosphere planets." I made some notes about how I thought it might work: nuclear-reactor powered, the reactor runs a jet engine and a compressor to inflate/deflate the balloon/wings, attaching small fast drone planes for flying out to gather info, other stuff like that.
2. First quick marker layout - actually I did all this digitally in Painter, so it's not really a "marker," but this is still how you do your first layouts, with a light gray 10%-30% marker to whip up a quick sketch:
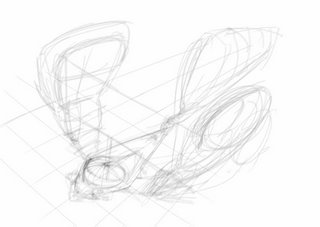
3. Next, on a new layer, a cleaner version of that super rough marker:
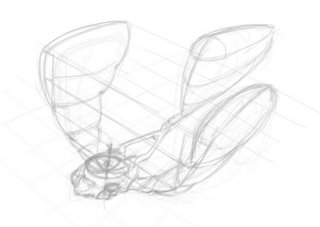
4. Now, lay in some fairly accurate perspective guides - to do this, I added a lot of canvas to the image so I could make a horizon line and vanishing points which are very far off the "page" of this drawing.
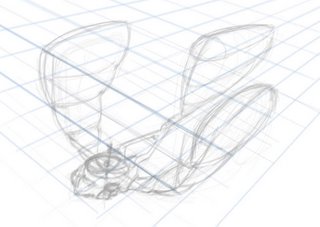
5. Chiang does a thing where he lays in very strong clear "centerlines" of some of the important components of whatever he's drawing, so I do that here. These lines stay in the final image, but I still put them on a separate layer in case they don't work for me.
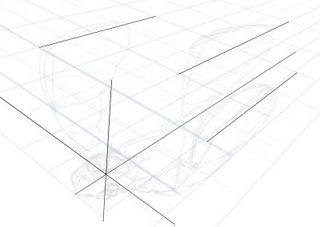
6. Time to do some inking. This is pretty straightforward, just using my "ID Pens" in Painter. I flipped the image to make sure nothing was off - something I do a lot, it's easy when you're digital. I flip 6 or 8 times during every stage of this process!
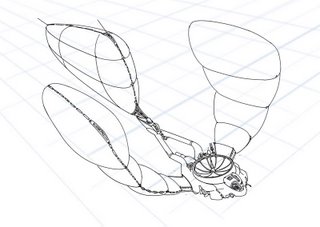
7. More inking. Adding more detail, thickening some lines.
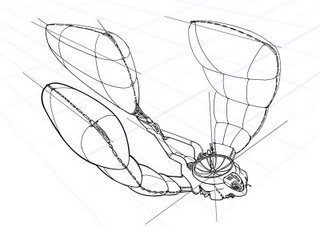
8. Final inking. Just added some small detail here, like in the antenna dish.
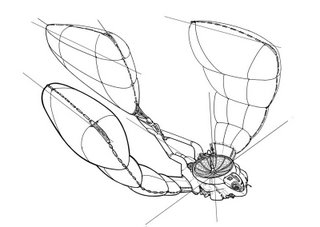
9. Marker rendering. This actually took 4 passes, because the first 3 sucked. Painter's "marker" tools are not quite like real markers, so I tried a number of approaches including using the watercolor brushes instead. Eventually I saved my own marker brush variant and did some major tweaks in the Brush Creator to make it behave much more like a real marker, and finally got something that satisfied me:
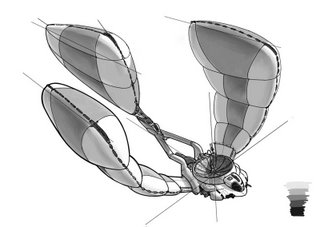
You can see I put in some color swatches there to pick from. They're 10, 30, 50, 70 and 90%, just like the real-life Prisma and Copic markers I use on paper.
10: Add a background - this thing looked boring on white, so I put in a layer underneath all the art and made a dark, cloudy bg using watercolor and chalk brushes plus a special cloud brush I adapted from David Levy's Photoshop brush set.

11. Final Image. I wanted to put white highlights on with "gouache," so I had to actually knock back the 100% white of the drawing. It's harder to do this in Painter than in Photoshop because the Contrast tools don't affect pure white. Instead, I made a new layer above the grayscale work, filled it with 5% gray, set it to Multiply and then flattened it down. Then I used a "gouache" brush with pute white to drop in some overlaid highlights.

Title it, sign it, date it, it's done. So, there's a design 3/4 drawing for this PEV. The next step will be a full-color paint in the target environment and a set of orthographic drawings. This view doesn't show many details of the construction that I see in my head, nor does it explain things like how the dish antenna actually flips itself over to streamline the plane for high-speed flight. Thus it's not enough for a modeler to build it to fit the "story."
The final paint will show both high-speed (balloons deflated to wings) and this low-speed configuration, with a bottom 3/4 view showing underside details and one of the little drones flying out to investigate something.
I'm gonna wait a bit on the final paint though. I want to get more design work done on different ideas that I have.
Hope you like this thing and a look at the process.

I saved out many progress images in case anyone wants to see the process. I'm trying to work in something similar to the Doug Chiang way, so...
1. I started with a really rough page of thought-scribblings, going with the first shape that popped into my head, which you'll see in the middle of the page.

The first thing that came to me was "aerial automated probe for dense-atmosphere planets." I made some notes about how I thought it might work: nuclear-reactor powered, the reactor runs a jet engine and a compressor to inflate/deflate the balloon/wings, attaching small fast drone planes for flying out to gather info, other stuff like that.
2. First quick marker layout - actually I did all this digitally in Painter, so it's not really a "marker," but this is still how you do your first layouts, with a light gray 10%-30% marker to whip up a quick sketch:

3. Next, on a new layer, a cleaner version of that super rough marker:

4. Now, lay in some fairly accurate perspective guides - to do this, I added a lot of canvas to the image so I could make a horizon line and vanishing points which are very far off the "page" of this drawing.

5. Chiang does a thing where he lays in very strong clear "centerlines" of some of the important components of whatever he's drawing, so I do that here. These lines stay in the final image, but I still put them on a separate layer in case they don't work for me.

6. Time to do some inking. This is pretty straightforward, just using my "ID Pens" in Painter. I flipped the image to make sure nothing was off - something I do a lot, it's easy when you're digital. I flip 6 or 8 times during every stage of this process!

7. More inking. Adding more detail, thickening some lines.

8. Final inking. Just added some small detail here, like in the antenna dish.

9. Marker rendering. This actually took 4 passes, because the first 3 sucked. Painter's "marker" tools are not quite like real markers, so I tried a number of approaches including using the watercolor brushes instead. Eventually I saved my own marker brush variant and did some major tweaks in the Brush Creator to make it behave much more like a real marker, and finally got something that satisfied me:

You can see I put in some color swatches there to pick from. They're 10, 30, 50, 70 and 90%, just like the real-life Prisma and Copic markers I use on paper.
10: Add a background - this thing looked boring on white, so I put in a layer underneath all the art and made a dark, cloudy bg using watercolor and chalk brushes plus a special cloud brush I adapted from David Levy's Photoshop brush set.

11. Final Image. I wanted to put white highlights on with "gouache," so I had to actually knock back the 100% white of the drawing. It's harder to do this in Painter than in Photoshop because the Contrast tools don't affect pure white. Instead, I made a new layer above the grayscale work, filled it with 5% gray, set it to Multiply and then flattened it down. Then I used a "gouache" brush with pute white to drop in some overlaid highlights.

Title it, sign it, date it, it's done. So, there's a design 3/4 drawing for this PEV. The next step will be a full-color paint in the target environment and a set of orthographic drawings. This view doesn't show many details of the construction that I see in my head, nor does it explain things like how the dish antenna actually flips itself over to streamline the plane for high-speed flight. Thus it's not enough for a modeler to build it to fit the "story."
The final paint will show both high-speed (balloons deflated to wings) and this low-speed configuration, with a bottom 3/4 view showing underside details and one of the little drones flying out to investigate something.
I'm gonna wait a bit on the final paint though. I want to get more design work done on different ideas that I have.
Hope you like this thing and a look at the process.
Labels: concept, design, drawing, final, gouache, layout, sketches
